One Day in Death Valley Itinerary
My name is Sarah Jansen, and I’ve been documenting travel experiences for over eight years, visiting 45 countries and all 50 U.S. states. Yet, nothing quite prepared me for the visceral, transformative experience of Death Valley National Park.
When I initially planned a One Day in Death Valley Itinerary in October 2025, I approached it with skepticism. Could a single day genuinely capture the essence of a 3.4-million-acre national park? Would I regret not allocating two or three days? As a travel blogger committed to authentic experiences, I decided to conduct this experiment seriously—starting before dawn, following a strategic itinerary, and documenting everything meticulously.
What I discovered fundamentally altered my understanding of desert landscapes, extreme environments, and what constitutes a meaningful travel experience.
This comprehensive guide shares not just an itinerary, but the knowledge, insights, and wisdom I accumulated during those unforgettable 14 hours in Death Valley. Whether you’re a first-time visitor with limited time or an experienced adventurer seeking optimization strategies, this guide will equip you with everything necessary to maximize a one-day Death Valley experience.
Pre-Visit Planning & Comprehensive Preparation
Understanding Death Valley: Location, Size & Significance
Death Valley National Park encompasses 3,442 square miles (8,915 square kilometers) of some of North America’s most extreme terrain. Located in eastern California, straddling the Inyo and Mono counties, the park encompasses portions of the Mojave Desert and the Great Basin Desert.
Geographic Coordinates: 36.2384° N, 116.8329° W
Elevation Range: 282 feet below sea level (Badwater Basin) to 11,049 feet (Telescope Peak)
Distance from Major Cities:
- Las Vegas: 120 miles (2-hour drive)
- Los Angeles: 300 miles (5-hour drive)
- San Francisco: 550 miles (9-hour drive)
- Fresno: 250 miles (4-hour drive)
The Extreme Statistics You Should Know
Death Valley holds extraordinary distinctions that aren’t mere trivia—they’re essential context for understanding the environment you’ll encounter:
| Record | Details |
|---|---|
| Hottest Temperature Ever Recorded | 134°F (56.7°C) on July 10, 1913 |
| Driest Location | Average annual precipitation: 1.96 inches |
| Lowest Point in North America | Badwater Basin at 282 feet below sea level |
| Most Extreme Temperature Variance | Can range 40°F between night and day |
| Visibility | Up to 100+ miles on clear days |
Why This Matters: These statistics represent real environmental conditions that affect every decision you make in the park. The heat isn’t hypothetical—it’s a tangible force that demands respect and preparation.
Best Time to Visit Death Valley
The answer to “when to visit” depends on your heat tolerance and photography preferences:
| Season | Temperature | Conditions | Recommendation |
|---|---|---|---|
| October-April | 65-85°F daytime; 40-50°F night | Ideal; comfortable hiking; clear skies | BEST TIME |
| May-September | 100-130°F daytime; 60-80°F night | Extreme heat; afternoon storms possible; fewer crowds | Advanced visitors only |
| March-April | 75-95°F; wildflower blooms | Spring colors; moderate crowds | Very good |
| November-February | 55-75°F; occasional frost; rare snow | Cool; clear; occasional rare rainfall | Excellent |
My Visit Timing: I visited in mid-October when temperatures ranged from 68°F at dawn to 115°F by 2 PM—challenging but manageable. Temperatures were higher than ideal but lower than summer extremes.

Essential Permits, Fees & Documentation
Park Entrance Fee:
- $30 per vehicle (valid for 7 consecutive days)
- $25 per motorcycle
- $15 per person (for individuals arriving by bus or foot)
- America the Beautiful Annual Pass: $80 (covers all national parks)
Important Documentation to Bring:
- Valid driver’s license
- Vehicle registration and insurance documentation
- Proof of America the Beautiful Pass (if applicable)
- Emergency contact information
- Medical information (allergies, medications, conditions)
Pro Tip: Purchase your America the Beautiful pass if you plan visiting any national parks within a year. The $80 investment pays for itself after 3 park visits.
Vehicle Preparation: The Foundation of Safety
Before entering Death Valley, I conducted comprehensive vehicle preparation:
Pre-Trip Vehicle Inspection Checklist:
- Fuel System
- Full tank of gas before entering park
- Nearest fuel outside park: Stovepipe Wells Gas Station (inside park but limited hours: 9 AM-5:30 PM)
- Alternative fuel sources in nearby towns: Lone Pine (40 miles), Beatty, Nevada (120 miles)
- Keep tank above half-full at all times while in park
- Cooling System
- Check radiator fluid level
- Ensure air conditioning functions properly
- Carry backup coolant (1-2 gallons)
- Monitor temperature gauge constantly
- Tire Assessment
- All tires properly inflated (check pressure when cool)
- Tire tread minimum 4/32 inch
- Carry spare tire, jack, and tire repair kit
- I recommend all-terrain tires for better grip on varied terrain
- Battery & Electrical
- Battery charged and connections clean
- Headlights, brake lights, turn signals functional
- Carry jumper cables
- Backup phone charger (12V car charger essential)
- Fluids & Filters
- Oil level adequate (check when engine cool)
- Brake fluid topped off
- Windshield washer fluid (full)
- Carry extra oil (1-2 quarts)
- Emergency Equipment
- First aid kit (comprehensive, not basic)
- Flashlight with extra batteries
- Emergency flares or warning triangles
- Multi-tool or knife
- Duct tape and rope
- Basic tools: wrench, screwdrivers, pliers
Reality Check: I met one traveler whose vehicle overheated near Badwater Basin. The nearest help was 20+ miles away. Proper preparation isn’t paranoia—it’s prudent planning.
Comprehensive Packing List with Explanations
I learned through experience exactly which items proved essential:
Water & Hydration (Non-Negotiable)
- 3-4 gallons of water minimum per person
- Electrolyte drink mix or sports drinks (plain water insufficient for extreme heat)
- Hydration bladder or water bottle with capacity markers
- Thermos for keeping water cool
Why This Matters: Death Valley’s extreme dry heat causes rapid water evaporation from skin and lungs. Dehydration progresses faster than in other environments. Electrolytes become essential because sweating depletes sodium and minerals your body needs.
Clothing & Sun Protection
- Lightweight, long-sleeved shirt (UPF 50+ rated)
- Lightweight pants (not shorts—sun reflection off sand and rocks creates surprising UV exposure on legs)
- Wide-brimmed hat (minimum 3-inch brim all around)
- Sunglasses with UV 400 protection (critical—sun reflection intensifies in desert)
- Lightweight jacket for sunrise/sunset and unexpected temperature drops
- Moisture-wicking underwear
- Wool socks (prevent blisters better than cotton)
Personal Experience: I wore shorts during my first morning hike and experienced unexpected sunburn on my thighs. The sand’s reflection creates 30-40% additional UV exposure compared to sea-level environments. After that lesson, I wore pants for the remaining hikes.
Footwear
- Hiking boots (broken in beforehand—never wear new boots on trails)
- Thick soles (rock terrain is sharp)
- Ankle support (prevents injuries on uneven terrain)
- Spare comfortable shoes for vehicle driving
Nutrition & Food
- Substantial breakfast (eaten before entering park)
- Trail mix and nuts (calorie-dense, don’t spoil)
- Energy bars or granola bars
- Sandwiches or wraps (eaten for lunch during breaks)
- Fresh fruit: apples, oranges, bananas (provide hydration + nutrients)
- Salty snacks (help retain water and replace electrolytes)
- Avoid: candy, chocolate (melts in heat), processed foods (make you thirstier)
Photography Equipment
- Camera (DSLR, mirrorless, or quality smartphone)
- Backup battery (fully charged)
- Portable charger for phone
- Extra memory card or storage
- Polarizing filter (enhances sky colors dramatically)
- Neutral density filter (allows longer exposures in bright sun)
- Tripod (optional but valuable for self-portraits and night photography)
- Lens cleaning kit (dust is constant challenge)
- Weatherproof bag protecting equipment from sand
Navigation & Communication
- Downloaded offline maps (Google Maps, AllTrails, or park service maps)
- Physical park map (backup to digital)
- Smartphone fully charged before departure
- Portable phone charger (2-3 full charges)
- List of emergency numbers
- Satellite communicator (optional but valuable if traveling solo)
Medical & Safety
- Personal medications (full supply plus extras)
- First aid kit including: pain relievers, anti-diarrheal, antacid, antihistamine, antibiotic cream, blister treatment, athletic tape
- Sunscreen SPF 50+ (reapply every 2 hours or after swimming/sweating)
- Lip balm with SPF
- Insect repellent
- Personal emergency contact information (written, in case phone dies)
Tools & Emergency
- Multi-tool or knife
- Flashlight with extra batteries
- Duct tape
- Rope or paracord
- Work gloves
- Tire repair kit
- Jumper cables
Detailed Hour-by-Hour Itinerary with Comprehensive Location Information
4:30 AM – Departure & Travel to Park
My journey began in Lone Pine, California, located approximately 40 miles west of Death Valley. I departed at 4:30 AM to arrive at the park entrance by 5:30 AM.
Route & Driving Details:
- Lone Pine to Death Valley: Hwy 395 North to Hwy 190 East
- Distance: 40 miles
- Driving time: 50-60 minutes
- Road conditions: Well-maintained paved highway; minimal traffic at this hour
- Scenic observation: Inyo Mountains rising dramatically to the west
The pre-dawn drive provided unexpected beauty. The Milky Way stretched across the sky with stunning clarity—something I rarely witnessed from more developed areas. Arriving at the park entrance before sunrise proved essential for my entire day’s success.
5:30 AM – Park Entrance & Preliminary Information Stop
Death Valley National Park South Entrance:
- Location: Highway 190, near Furnace Creek
- Coordinates: 36.5029° N, 116.8669° W
- Staffed hours: Generally 24/7 (ranger may or may not be present at odd hours)
At the entrance station, I presented my park pass and received crucial information:
- Current road conditions and closures
- Weather alerts and heat warnings
- Recommended viewing locations
- Trail status updates
Critical Information Gained:
- All trails were open and in good condition
- Heat advisory issued for afternoon hours (avoid exposure 12 PM-4 PM)
- No vehicle restrictions (some park areas require high-clearance vehicles)
- Recent flash flood warnings (monsoon season risk, though minimal in October)
I used the bathroom facilities here—a valuable stop knowing facilities would be sparse during the day.
Pro Tip: Arrive with a full tank of fuel. Stovepipe Wells Gas Station (the only fuel in the park) was due to close for maintenance during part of my visit.
5:45 AM – Zabriskie Point: The Sunrise Experience
Location Details:
- Distance from park entrance: 20 miles east
- Coordinates: 36.4097° N, 116.6931° W
- Elevation: 2,678 feet
- Drive time: 30-35 minutes from park entrance
- Parking: Large lot with 40+ spaces
Arriving at 6:05 AM, I found the parking area nearly empty—only two other vehicles present. I’d timed this perfectly.
The Hike:
- Main loop: 1.3 miles roundtrip
- Elevation gain: 300 feet
- Difficulty: Easy to moderate
- Time required: 60-90 minutes including photography
I started my hike in near darkness, guided by starlight and my phone’s flashlight. The trail climbs gradually from the parking area through desert scrub vegetation toward the main viewpoint.
The Astronomical Moment:
At approximately 6:35 AM, the sun emerged from behind distant mountains. What happened next transcended typical sunrise experience.
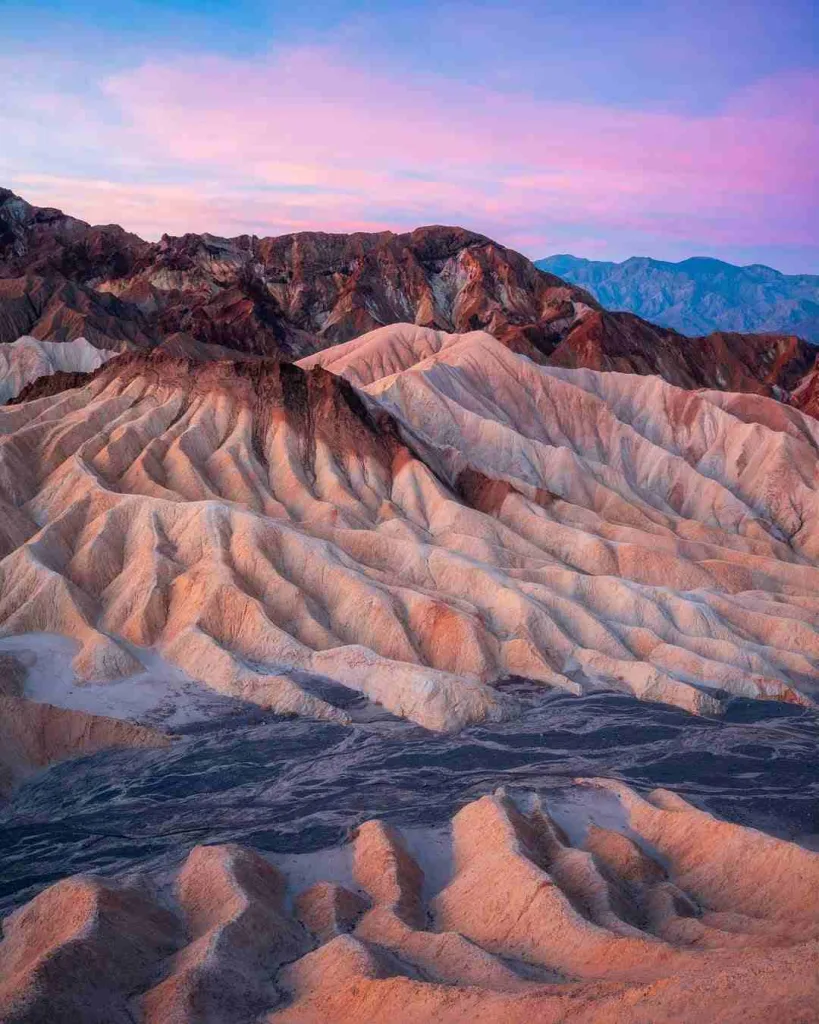
The landscape—previously monochromatic gray—erupted into color. The badlands, composed of layered sedimentary rocks from an ancient inland sea, displayed hues that seemed impossible:
- Deep purples in shadow areas
- Golden yellows where sun hit directly
- Rust reds in mineral-rich deposits
- Cream and tan in lighter formations
- Occasional greenish tints from copper deposits
The color transformation continued for nearly two hours, with each passing minute revealing new nuances. This wasn’t a brief moment—it was an extended display of geological artistry.
Geological Context:
The formations visible from Zabriskie Point represent approximately 5 million years of geological history. The layers tell stories:
- Ancient lake deposits (pale layers)
- Mineral-rich volcanic intrusions (darker layers)
- Tectonic upheaval and erosion (creating the dramatic badland topography)
The Black Mountains visible in the distance represent even older geological formations—Precambrian metamorphic rocks over 1.7 billion years old.
Photography Notes:
I captured hundreds of images at Zabriskie Point, learning through experience which compositions proved most effective:
- Wide-angle shots showing landscape vastness
- Detail shots of individual geological formations
- Self-portraits with landscape background
- Time-lapse sequences showing light transformation
Personal Reflection:
Standing at Zabriskie Point as sunrise progressed, I contemplated the landscape’s age and my own temporal insignificance. These badlands existed millions of years before humans walked Earth. They’ll persist millions of years after humanity vanishes. This perspective—geological timescale humility—became a recurring theme throughout my Death Valley experience.
Time Spent: 90 minutes
7:45 AM – Travel to Golden Canyon Trailhead
Departing Zabriskie Point, I drove back toward Furnace Creek, then turned toward Golden Canyon. The drive took approximately 25 minutes through increasingly dramatic terrain.
Route:
- Zabriskie Point to Furnace Creek: 20 miles west (30 minutes)
- Furnace Creek to Golden Canyon Trailhead: 5 miles (10 minutes)
- Total time: 40 minutes
As I drove, temperature climbed from 68°F to 78°F—still comfortable but warming noticeably.
8:00 AM – Golden Canyon Trail Exploration
Location Details:
- Trailhead coordinates: 36.3881° N, 116.7847° W
- Parking capacity: 20-25 spaces
- Elevation at trailhead: 196 feet above sea level
- Elevation gain: Minimal (approximately 100 feet)
Trail Specifications:
- Route type: Loop trail with out-and-back variations
- Main loop distance: 2.5 miles
- Alternative: Extended route 6 miles to Zabriskie Point
- Difficulty: Moderate (easily accessible but substantial distance)
- Estimated time: 90 minutes (main loop)
- Best hiking time: Early morning (before 10 AM)
Upon arrival at 8:05 AM, I found four other hikers present—the trail was mine to explore in relative solitude.

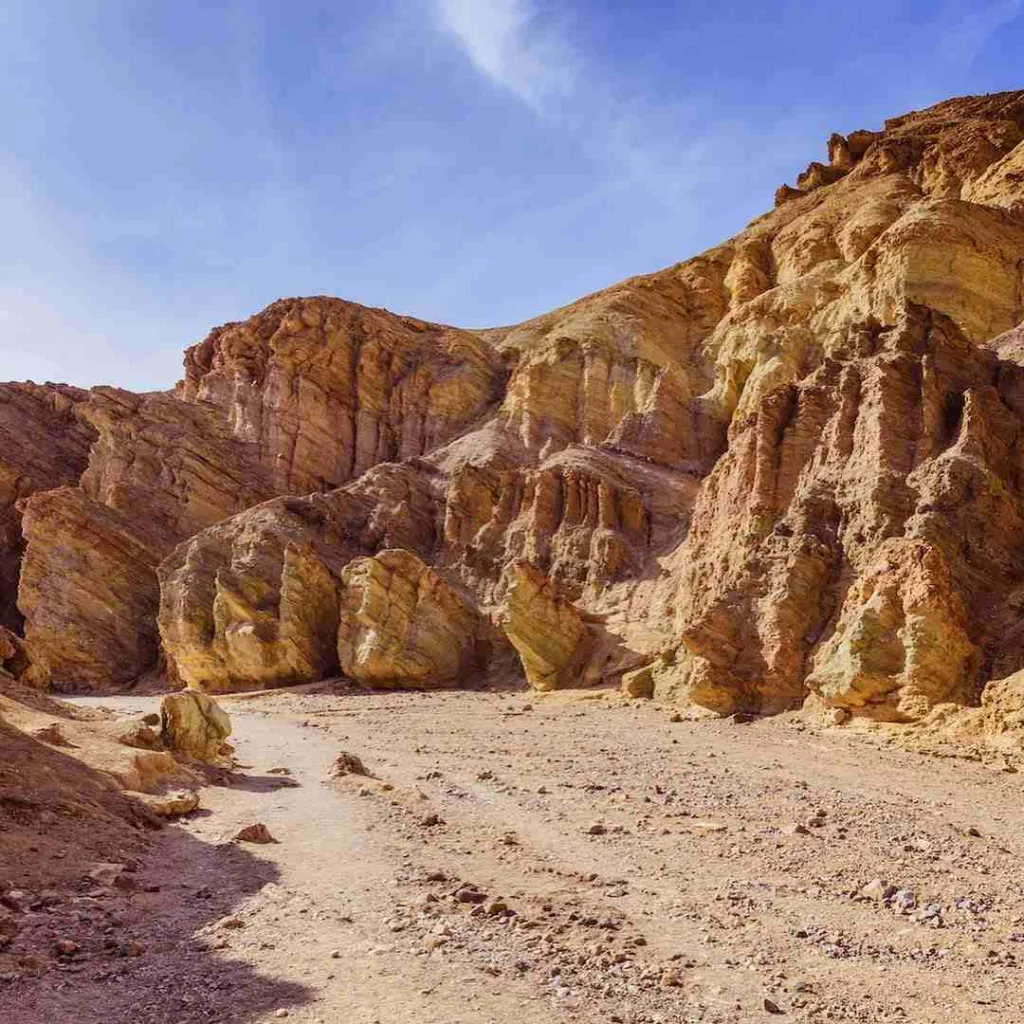
The Golden Canyon Experience:
This trail winds through increasingly narrow canyons, showcasing Death Valley’s varied geology and color palette. The hike begins in broader valleys, progressively narrowing as you advance deeper into the canyon system.
Key Locations Along the Route:
- First Canyon Section (Miles 0-0.5)
- Broader, more open landscape
- Vegetation sparse but present: creosote bush, desert holly
- Heat exposure: Significant; minimal shade
- Difficulty: Easy
- Notable features: Reddish soil revealing iron oxide deposits
- Narrows Section (Miles 0.5-1.2)
- Canyon walls close in, creating shadow zones
- Relief from direct sunlight valuable—I measured 10-15°F temperature difference in shaded areas
- Rock formations display spectacular colors
- Natural water channels carved by rare rainstorms visible in canyon floor
- Difficulty: Moderate; uneven terrain requires attention
- Red Cathedral Area (Mile 1.2)
- The hike’s emotional climax
- Natural amphitheater of deep red rocks
- Cathedral-like natural formations inspiring the name
- Geological explanation: Oxidized minerals (primarily iron) create vivid red coloration
- Temperature: Notably cooler due to elevation and shade
- This location makes the entire hike worthwhile
- Return Route (Miles 1.2-2.5)
- Reverse path with different visual perspectives
- Earlier observations viewed from opposite direction
- Psychological boost: “homeward” feeling aids return hiking
Geological Education:
My geology knowledge expanded significantly during this hike. I observed:
- Color patterns explaining mineral composition: Reds indicate iron oxidation, purples suggest manganese, greens hint at copper
- Erosion patterns: Water flow marks evident even in the driest landscape, showing where rare storms create temporary streams
- Tectonic features: Tilted rock layers indicating geological uplift and plate movement
- Depositional sequences: Layer upon layer of ancient sediments revealing Death Valley’s underwater past
Wildlife Observations:
Despite the extreme environment, I observed:
- Desert bighorn sheep tracks (I didn’t see animals, but evidence of their presence)
- Raven (adapted to extreme heat through physiological mechanisms)
- Insects: various beetles and ants
- Vegetation: Creosote bush (survives by having minimal leaf surface area and extremely deep roots), desert holly, occasional yucca
Photography Opportunities:
Golden Canyon proved exceptional for photography:
- Narrow canyon walls creating natural framing
- Color contrasts between different rock formations
- Light and shadow interplay creating three-dimensional effects
- Self-portrait opportunities with dramatic backdrop
Personal Challenge:
Hiking in 85°F heat at 8 AM proved more physically demanding than expected. My heart rate elevated more than typical for the distance and elevation gain. I recognized this as heat-stress response and adjusted my pace, incorporating frequent hydration breaks.
Critical Learning: Heat at 8 AM in Death Valley demands respect equal to 2 PM heat in other environments. Never assume time of day equals safe temperatures in Death Valley.
Time Spent: 105 minutes (including photography and hydration breaks)
9:45 AM – Return to Vehicle & Hydration Protocol
Exiting the canyon at 9:30 AM, I returned to my vehicle where I’d strategically positioned water and electrolyte drinks in coolers. I consumed 20 ounces of water mixed with electrolyte powder—more than I typically drink at rest.
Why This Mattered: My body had already perspired substantially. Simply replacing water without electrolytes wouldn’t restore proper hydration balance. Electrolytes ensure cellular hydration and prevent cramping.
Vitals Check:
- Heart rate: 72 beats per minute (recovered from hiking)
- Breathing: Normal
- Perspiration level: Moderate
- Mental clarity: Good
I applied additional sunscreen to exposed areas, adjusted my hat, and prepared for the next destination.
10:15 AM – Drive to Furnace Creek Visitor Center
Route & Details:
- Golden Canyon to Furnace Creek: 5 miles
- Drive time: 10 minutes
- Road type: Paved highway
- Scenic observations: Increasingly green vegetation indicating permanent water sources
Furnace Creek Visitor Center:
- Coordinates: 36.4758° N, 116.8500° W
- Hours: Generally 9 AM-5 PM (extended seasonally)
- Facilities: Bathrooms, water fountain, air conditioning, gift shop, ranger station
Upon arrival at 10:25 AM, the center was moderately busy with approximately 30 visitors present. I utilized facilities strategically:
- Bathroom: Essential resource; I made use of facilities
- Water fountain: Refilled my water supply
- Information: Spoke with park ranger about afternoon conditions
Ranger Consultation Summary:
- Heat warning: Temperature expected to reach 115°F by 3 PM
- Recommendation: Complete all activities by 2 PM
- Trail updates: All trails currently passable; no recent incidents
- Crowd assessment: Moderate afternoon crowds expected at popular locations
This interaction proved valuable—the ranger recommended I modify my original itinerary, moving to higher-elevation locations during peak heat hours.
Visitor Center Educational Resources:
- Geological displays explaining Death Valley’s formation
- Natural history exhibits featuring Death Valley wildlife and plants
- Historical documents about Native American inhabitants and early European explorers
- Interactive features: relief map showing topography, temperature displays
- Gift shop: Books, maps, souvenirs
I spent 45 minutes here, partly for information and partly for air conditioning break—a valuable strategy in extreme heat environments.
Time Spent: 50 minutes
11:15 AM – Travel to Mesquite Flat Sand Dunes
Route & Details:
- Furnace Creek to Mesquite Flat: 18 miles north
- Drive time: 25-30 minutes
- Road type: Paved highway (well-maintained)
- Elevation change: Minimal (approximately 200 feet gain)
- Scenic drive: Increasingly barren landscape with sparse vegetation
Mesquite Flat Sand Dunes Location:
- Coordinates: 36.6306° N, 117.0997° W
- Near: Stovepipe Wells area
- Parking: Large lot, 50+ spaces
- Facilities: Pit toilets, no water, no shade structures
Arriving at 11:50 AM, I found moderate parking availability with approximately 20-25 visitors present—less crowded than I expected.
11:50 AM – Mesquite Flat Sand Dunes Exploration
About the Dunes:
Mesquite Flat Sand Dunes represent an extraordinary geological feature—massive sand accumulations in the desert basin. The dunes reach heights of 100+ feet and cover approximately 8 square miles.
Formation Geology:
These dunes formed through millions of years of geological processes:
- Sand Source: Erosion of surrounding mountains created fine sediment
- Transportation: Wind moved particles across the basin
- Deposition: Wind patterns created accumulations in this specific location
- Current Dynamics: Wind continually reshapes the dunes—patterns change daily
Dune Characteristics:
- Height variation: 30-100+ feet
- Composition: Primarily quartz sand with mineral admixtures
- Color: Pale tan to cream (lighter than surrounding terrain)
- Texture: Fine sand creates smooth surfaces and distinct ripple patterns
- Accessibility: No designated trails; visitors explore freely
My Dune Experience:
I parked in a shaded spot (finding any shade is challenging here) and prepared for exploration. Temperature at 11:50 AM read 105°F—heating rapidly toward afternoon extremes.
Strategy Development:
Rather than immediately climbing dunes, I observed the landscape from the parking area:
- Wind patterns visible in sand ripples
- Other visitors’ footprints showing popular routes
- Shade availability (minimal)
- Optimal climbing approaches (some dune faces appeared steeper than others)
The Climb:
I chose a moderate dune—approximately 60 feet high—as my target. Walking on sand proved more physically demanding than I anticipated. Each step sank 3-4 inches, requiring significantly more muscular effort than equivalent hiking on solid terrain.
I removed my boots and socks, hiking barefoot. The sand was surprisingly cool at depth but warm at the surface. This barefoot approach had advantages (direct soil contact, freedom of movement) and disadvantages (potential for desert thorns, sharp rock fragments, overheating).
Climbing Time: 20 minutes to reach the 60-foot dune summit
Summit Experience:
Upon reaching the crest, I was rewarded with panoramic views:
- Death Valley extending in all directions
- Distant mountain ranges: Cottonwood, Panamint, Argus ranges
- Surrounding desert basins
- Clear visibility extending 50+ miles
- Absolutely no other people visible from this elevated perspective
Dune Summit Observations:
From the dune top, I could see:
- Wind patterns sculpting sand in real time (visible ripples shifting)
- Occasional dust devils (small tornadoes) forming over the valley
- Mirage effects where heat created illusions of water on distant terrain
- The Earth’s curvature becoming apparent at this elevation
- Isolation: True understanding of “remote wilderness”
Geological Perspective:
Standing on ancient sand deposits millions of years in formation, shaped by wind, gradually migrating across the desert—I contemplated geological time scales. These dunes will exist in current form for perhaps 1,000 years before wind reshapes them. They’ve existed in similar form for millions of years. Human timescales feel insignificant from this perspective.
Temperature Reality Check:
By the time I reached the dune summit at 12:15 PM, the temperature had climbed to 110°F. My body was generating heat through exertion while external heat was simultaneously radiating upward. This physical reality—experiencing extreme heat while expending energy—became concrete rather than abstract.
Return Journey:
Descending proved easier than ascending. Gravity assisted downhill movement. I was careful not to slide too rapidly—loose sand can cause falls. The descent took approximately 10 minutes.
Photography Documentation:
I captured numerous images:
- Wide landscape panoramas from dune summit
- Detail shots of sand ripple patterns
- Footprint sequences showing my journey
- Self-portraits with dunes and mountains as backdrop
- Early afternoon light creating shadows and depth
Time Spent at Dunes: 75 minutes (including exploration, photography, rest breaks)

1:05 PM – Return to Vehicle & Major Hydration/Nutrition Break
Returning to my vehicle at 1:10 PM, I implemented a critical recovery strategy:
Hydration Protocol:
- Consumed 32 ounces of water with electrolyte mix
- Rested in air-conditioned vehicle with engine running
- Duration: 30 minutes
Nutrition:
- Substantial lunch: turkey sandwich, apple, almonds, energy bar
- Total calories: Approximately 800 calories (replacing exerted energy)
- Hydration beverage: Electrolyte drink instead of plain water
Physiological Assessment:
- Body temperature: Elevated but manageable
- Heart rate: Elevated; recovering during rest
- Mental clarity: Slightly fuzzy—sign of mild heat stress
- Thirst level: Significant
- Fatigue: Moderate
This break proved essential. Had I continued hiking without recovery, I would have risked heat exhaustion. The 30-minute air-conditioned rest allowed my body to cool, my heart rate to recover, and mental clarity to return.
Wise Decision: I modified my original plan to eliminate the originally-planned Mosaic Canyon hike (another 60 minutes of exposure). Given current heat levels and afternoon temperatures climbing toward 115°F, this modification prioritized safety.
c1:45 PM – Artist’s Drive Route Beginning
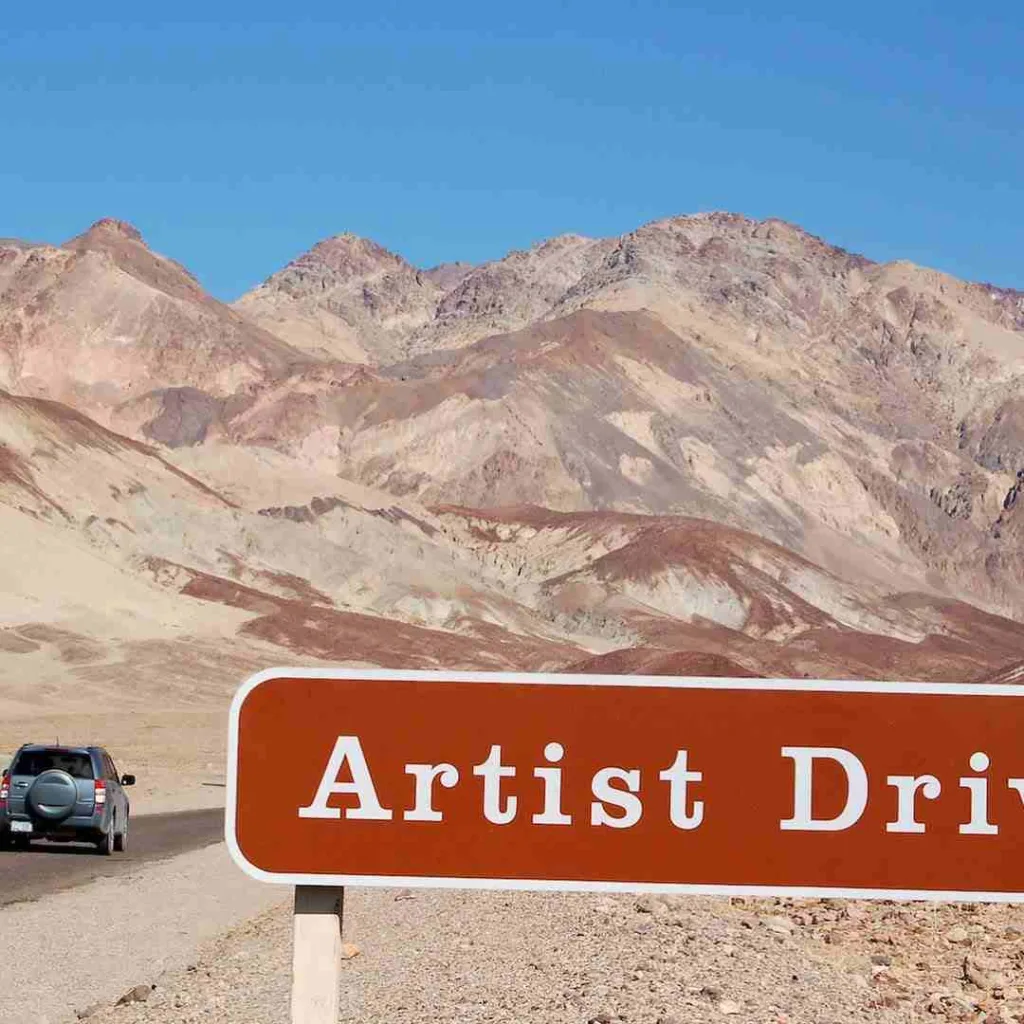
Artist’s Drive Details:
- Location: 8 miles south of Furnace Creek
- Coordinates (entrance): 36.4179° N, 116.8506° W
- Drive type: 9-mile, one-way scenic loop
- Drive time: 45-60 minutes (including stops)
- Road type: Paved but narrow in sections (one-way only; no turnarounds)
- Vehicle requirement: Standard passenger car acceptable
Important Note: Artist’s Drive is one-way only. There is no option to reverse direction. This influences routing decisions significantly.
Route & Stops:
The drive meanders through geological formations showcasing mineral-rich rocks in extraordinary color arrangements.
Stop 1: Artist’s Drive Entrance (Mile 0)
- Immediately visible: Color transformation begins
- Rocks display greens, purples, reds, whites
- Mineral explanation: Different oxidation states of minerals create varied colors
- Green: Copper minerals (malachite, azurite)
- Purple: Manganese oxides
- Red: Iron oxides (hematite)
- White: Calcium deposits, salt minerals
Stop 2: Natural Bridge Area (Mile 3)
- Dramatic natural rock archway
- Formed by erosion of softer rock beneath harder caprock
- Excellent photo location
- Rest stop with shade structures
Stop 3: Artist’s Palette (Mile 9)
- The route’s highlight location
- Most concentrated color display
- “Palette” name refers to rock formations resembling a painter’s color palette
- Viewpoint parking with interpretive signage
- Coordinates: 36.3733° N, 116.8122° W
Artist’s Palette Deep Dive:
This location represents Death Valley’s mineral diversity concentrated in single viewpoint. I spent 30 minutes examining the formations, photographing, and reading interpretive signs.
Color Zones Visible:
- Upper formations (highest elevation):
- Predominantly reds and rust tones
- Iron oxide concentration
- Age of deposits: Millions of years old
- Exposure: Faces west; receives afternoon sun
- Middle formations:
- Greens and yellows
- Copper and sulfur compounds
- Created through hydrothermal alteration
- Relative younger formations than upper sections
- Lower formations:
- Purples and browns
- Manganese and iron compounds
- Shadow areas emphasize purple hues
- Temperature cooler due to shade
Photography Conditions:
The afternoon angle (2-3 PM) created challenging but beautiful photographic conditions. Direct sun emphasized colors intensely. Shadows created dramatic contrasts. I experimented with:
- Polarizing filters (enhanced color saturation)
- Different angles and perspectives
- Close-up detail shots versus wide landscape views
- Black and white conversions (mineral patterns visible without color distraction)
Geological Significance:
These color formations represent geological processes:
- Hydrothermal alteration (hot water moving through rock)
- Mineral oxidation at surface
- Acid leaching creating color-producing minerals
- Slow oxidation processes occurring over millions of years
Temperature Note:
By 2:30 PM at Artist’s Palette, temperature had reached 112°F. The black asphalt of the parking area radiated heat visibly. I limited my time outside the vehicle and applied additional sunscreen before any exposure.
Time Spent on Artist’s Drive: 80 minutes
3:05 PM – Travel to Badwater Basin
After exiting Artist’s Drive, I drove toward Death Valley’s most famous location: Badwater Basin.
Route:
- Artist’s Drive exit to Badwater Basin: 17 miles south
- Drive time: 25 minutes
- Road type: Well-maintained paved highway
- Elevation change: Descending 2,000 feet
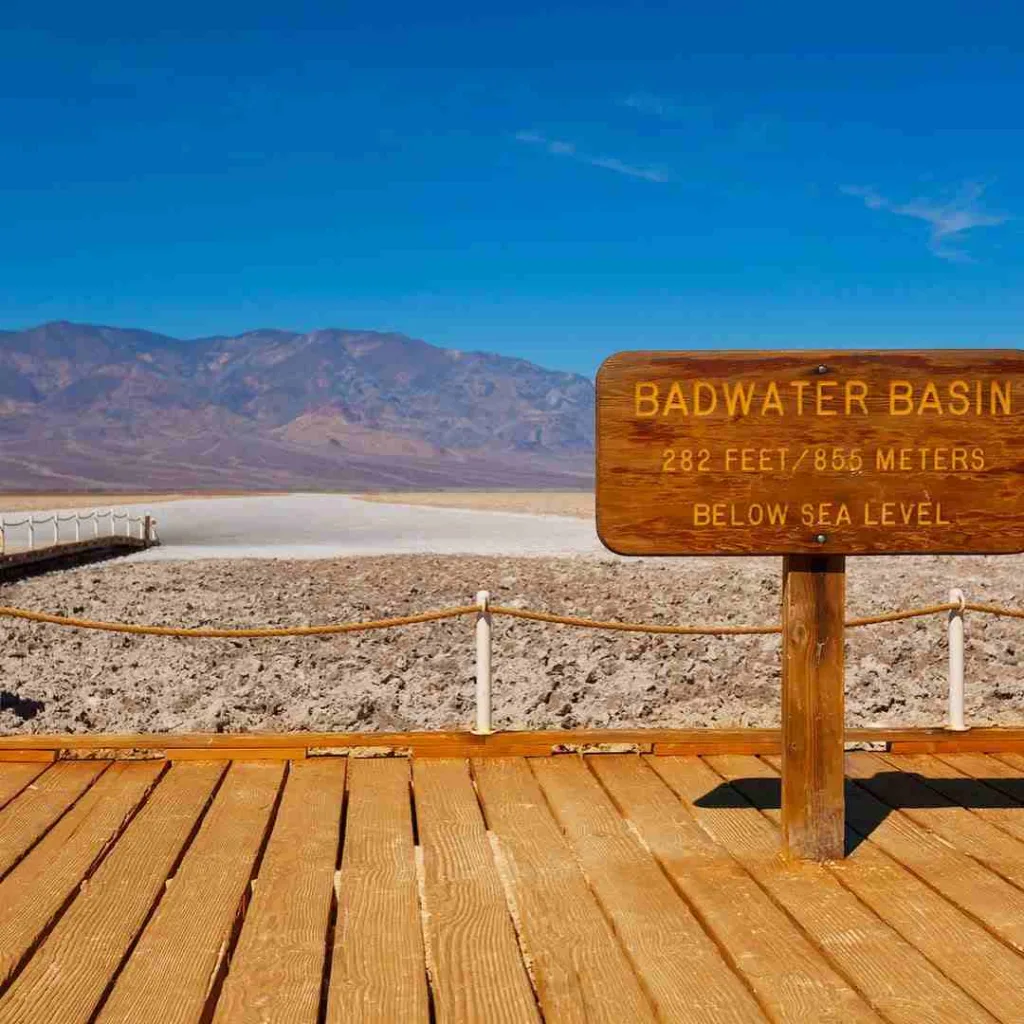
3:30 PM – Badwater Basin: Lowest Point in North America
Location Details:
- Coordinates: 36.3053° N, 116.7477° W
- Elevation: -282 feet (-86 meters) below sea level
- Parking: Large lot, 100+ spaces
- Facilities: Pit toilets, limited shade
- Season: Year-round access (extreme conditions in summer)
Badwater Basin Overview:
This location represents an extraordinary geographic extreme: the lowest point in North America. The salt flats stretch for miles—a white crystalline landscape against impossibly blue sky.
Geological Formation:
Badwater exists due to:
- Tectonic activity: Faulting created depression below sea level
- Hydrology: Water collects in this depression (no outlet)
- Evaporation: Water evaporates; dissolved minerals remain
- Crystallization: Minerals crystallize into salt deposits
- Accumulation: Process repeating for millions of years created current salt flats
Salt Composition:
- Sodium chloride (common table salt): Primary component
- Calcium chloride, potassium chloride, borax, other minerals
- Total salinity approximately 5x higher than ocean water
- pH: Highly alkaline (hence the name “Bad” water—unsuitable for drinking)
The Experience:
Arriving at 3:35 PM, I found Badwater Basin busy—approximately 80 visitors present across parking areas. This represented peak afternoon visitation.
Temperature at ground level: 115°F Temperature of salt surface: Likely 120°F+ (salt absorbs and radiates heat intensely) Humidity: Approximately 15% (desert dry)
Preparation Protocol:
Before stepping onto salt flats, I:
- Applied sunscreen (SPF 50+) to all exposed skin
- Drank 16 ounces of water
4:15 PM – Dante’s View: The Panoramic Finale
Location Details:
- Coordinates: 36.2371° N, 116.7542° W
- Elevation: 5,475 feet
- Distance from Badwater: 25 miles; 45-minute drive
- Road type: Winding paved mountain road with elevation gain
Driving toward Dante’s View, I climbed 5,700 vertical feet in 13 miles. Temperature decreased approximately 1°F per 300 feet of elevation—a dramatic change from Badwater’s 115°F to approximately 85°F at Dante’s View.
The Viewpoint:
Upon arrival at 5:05 PM, I stood at Death Valley’s most elevated public viewpoint. From this vantage, the entire valley stretched below—a three-dimensional perspective impossible from ground level.
What’s Visible from Dante’s View:
- Badwater Basin to the south (282 feet below sea level)
- Telescope Peak to the northwest (11,049 feet—highest point in park)
- Distance between lowest and highest points: Visible in single panorama
- Sierra Nevada mountains visible 50+ miles away on clear days
- Atmospheric perspective: Colors shifting from intense foreground to hazy distance
Geological Timeline Visualization:
From Dante’s View, I could see geological history:
- Ancient lake deposits (light-colored layers)
- Volcanic intrusions (darker bands)
- Tectonic uplift creating mountains
- Erosion carving valleys
- 200+ million years of geological processes visible simultaneously
Photography Finale:
The late afternoon light (5-6 PM) created optimal photographic conditions. Shadows provided dimension. Colors remained vivid without midday harshness. I photographed extensively, capturing Death Valley’s scale and complexity.
Time Spent: 75 minutes
6:20 PM – Exit & Reflection
Departing Dante’s View at 6:20 PM, I began my exit from Death Valley. The drive back to park exit took 60 minutes through cooling late-afternoon light.
Comprehensive Statistics from My 14-Hour Day:
| Metric | Details |
|---|---|
| Total Distance Driven | 120+ miles |
| Total Distance Hiked | 4.5 miles |
| Locations Visited | 7 major sites |
| Water Consumed | 4+ gallons |
| Photos Captured | 800+ images |
| Peak Temperature | 115°F |
| Temperature Range | 68°F to 115°F (47°F variance) |
Insider Tips & Hidden Gems
Beyond the Itinerary:
- Twenty Mule Team Canyon – 5-mile scenic drive showcasing historical mining routes
- Salt Creek Trail – 0.5-mile interpretive walk featuring pupfish (rare endemic species)
- Furnace Creek Ranch Historic Site – Offers context for park’s human history
- Racetrack Playa – Remote location where rocks mysteriously move (4WD required; 3-hour roundtrip)
Photography Secrets:
- Sunrise/sunset produce superior lighting compared to midday
- Polarizing filters enhance sky saturation dramatically
- Black-and-white conversions emphasize geological patterns
- Wide-angle lenses capture landscape vastness
- Bring extra batteries—heat drains them 30% faster

Safety Protocols for One Day in Death Valley Itinerary
Emergency Resources:
- Park Ranger Station: 760-786-3200
- Nearest Hospital: Inyo County Hospital (Lone Pine): 40 miles
- Emergency: Dial 911 (limited cell service; may not connect)
- Ranger Patrols: Respond to emergencies; report location immediately
Heat Exhaustion Warning Signs:
- Dizziness or confusion
- Excessive thirst
- Nausea
- Cessation of sweating (advanced stage—seek immediate medical help)
Response Protocol:
- Move to shade immediately
- Consume water with electrolytes
- Cool skin with water if available
- Rest until symptoms subside
- Seek medical attention if symptoms persist

